CARDS FOR SALE

Most cards you see on this site are available for purchase. Simply click the Pay Now button at the bottom of the post of an available card to purchase the card. You will be linked to PayPal for payment. It will come up as "greensnaggletooth@cox.net" which is the name of my internet company. Price is $5.00 unless otherwise stated and includes shipping. Your card will come with an envelope also. Email me with any questions or requests at: sharynsstampbiz@gmail.com
Thanks for taking a look at my creations!!

Friday, April 29, 2011

New Punches

Yesterday I shared a card that had these cute blossoms on it.  I told you I would share the new punch from the Summer Mini that I used to create it.  It is called the Blossom Bouquet Triple Layer Punch.  There is also another one called the Doily Triple Layer Punch.  Here they are:


What makes these special is that each one will do three different punches.

The sliding button on the back makes this possible.  To store the punch in the closed position, the button needs to be all the way to the right as shown above.  Once the punch is open, you can move the button to any of the 3 positions to achieve whichever punch you need.  Let's start with the Blossom Bouquet.

In the far left position, you get a solid blossom when it punches.  Once you move it to the center, you can punch another piece of paper and get the outer ring of the blossom.  Although I forgot to include it in the picture, you will also get the center flower which is solid.  It is the same size as the final punch, just solid.  When punching the ring, you will hear the punch punch twice.  The final punch gives you the small flower with the teardrop shapes out of it.  You will also get the outer ring (again I forgot to include it).  The punch will punch three times as you press it down.  I love this because I can save the extra solid flower and ring to use on another project.  You can even save the teardrops.  I will share a card soon that uses them.  Now for the Doily.

Again to store the punch, the button needs to be all the way to the right.  Once open, you can slide it to the left to get a solid doily.  The middle position will give you the same doily but with the outer portion of it punched with a design.  Again, it will punch twice as you press on it to achieve this.  The far right position gives you the same size doily but this time the design is on the outer and inner parts of it.  It also reminds me of a snowflake.  Just as the blossom, it will punch three times as you press down.  
While these do cost more than other punches offered by Stampin' Up! (they are $23.95 each), it is like getting 3 punches in one.  I absolutely love these.  When I first saw them in the Summer Mini, I was unsure as to whether or not I would like them.  I went ahead and ordered them anyway so that I could share them with my customers.  Boy am I glad I did.  They are wonderful!

Well, no card for today.  I wanted to be share these with you so you could see all they will do.  I wish you all a great weekend, and I will be back Monday.  Thanks for stopping in today.

Thursday, April 28, 2011

More Sneak Peeks

Today I wanted to continue to share some more items from the Summer Mini Catalog which goes live on Sunday, May 1st.  I found so many cute items in it.  I had a hard time deciding which ones to order.  So I decided as far as stamps, I would stick with one theme: summer fun.

Yesterday I shared the surf boards from the Summer Splash set.  Today, lets take a look at another stamp set called Sunny Fun.  This set contains 5 stamps: 2 sayings and 3 summer theme stamps (flip flops, frozen treats, and tubing children).  I chose to work with the tubing children for today mainly because it reminds me of my family.  My husband and oldest daughter, Heather, love to go tubing down the Salt Lake River.  Heather and her friends seem to go almost every year.  My husband not as much, but he loves it.  So this reminded me of them.


Of course, in reality the only child in this group who is positioned right to tube the river is the first boy with star glasses.  The river is not deep enough for the other ways.  Don't they just look like they are having the best time?  This stamp made me smile when I saw it.  The little saying "fun in the sun!" is one of the sayings from this stamp set.  I used  Marina Mist for my base card, with a layer of Crumb Cake on top of it.  I ran the Crumb Cake through my crimper to give it some texture before adhering it.  The kids are trimmed with Cajun Craze which had been punched on each side with the Scallop Edge Border punch.  The flowers are also from a new punch in the Summer Mini.  They are punched in Daffodil Delight, Marina Mist, and Pear Pizzazz.  I bet you might be wondering what the new punch is called.  Well, I am going to leave that for tomorrow.  It is a really cool punch and does so much.  It is one of 2 of this new type and I will share both tomorrow.  Now lets look at how I colored the kiddos.


I decided to go to one of my favorite ways to add color to bring this stamp to life:  watercoloring.  Now there are several ways you can do this:  you can use the watercolor crayons or pencils, use the aqua painters with your ink pads, or use the blender pens with your ink pads.  My prefered method is the blender pens.  To start, you stamp the image in Staz-On ink so there will be no bleeding when the water touches it.  I realize the paper resembles the Very Vanilla cardstock which I did use to stamp the saying on, but it is actually Watercolor Paper.  You can use regular cardstock to do this method.  I simply like the high quality of the watercolor paper and the final look you get with it.  Now the thing that probably surprises you the most about this card is the fact that there is no glitter on it!  Can you believe it?  I will have to rethink this design.  I am sure glitter would fit in somewhere!  All the supplies for this card are from Stampin' Up!, including the brads.  I love their products!!
Tomorrow I will show you the new punches.  I hope you enjoyed this card today.  With temperatures in the 90's we here in Arizona are all ready to play in the pool!  Thanks for coming by today. 

Wednesday, April 27, 2011

Summer Mini Sneak Peek

I thought I would give you a sneak peek of a few items that will be available in the Summer Mini Catalog from May 1 through August 31.  If you have not received your Mini and would like one, please let me know and I will send one out to you.

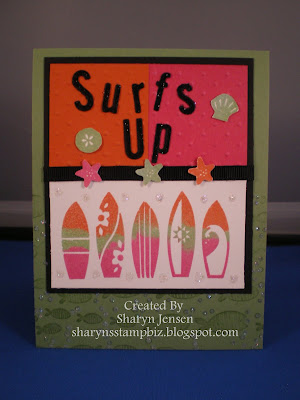
With summer right around the corner, I decided to focus on a set called Summer Splash.


This is a fun set with the surf board stamp and the sea shell stamp.  Also included is a smiling turtle, a smiling octopus, a fish, a pail and shovel, and some bubbles.  I used only the surf board and sea shell stamps for today's card.  Let's take a little closer look at the card.


You can see that behind the surf boards are some cute little fish just swimming along.  This is a jumbo wheel called Fish Frenzy also available in the Summer Mini.  I rolled the fish onto a Wild Wasabi base card in matching ink.  The bubbles have glitter added to them to make them sparkle (you did not think I would forget glitter did you?).  Just a note about the sea shells.  They are one stamp with the three designs on it.  I cut the shells out to go on my card.  The letters for "Surfs Up" were made using my Big Shot and a sizzlit decorative strip die called Billboard.  It cuts all letters of the alphabet out, both capitals and lower case.  I use what I need and save the rest for another card. This way none go to waste. Of course, to my letters I added black glitter.  No surprise there. My color scheme for this particular project is Wild Wasabi, Tangerine Tango, and Melon Mambo.  How did I come up with that you ask?  It was easy.  The Summer Mini helped make that decision.  A closer look at the surf boards will explain. 


Notice the shine?  In the new Summer Mini, you will find my 3 chosen colors available in Stampin' Emboss Powder.  I was so excited to get these powders and to heat emboss with them.  They are beautiful!!!  You can also see the shine on the starfish.  I stamped 3 sets of shells, heat embossed each set with one of the new embossing powders, and cut all shells out.  I saved the ones I did not use on here for another card. 

This was a lot of fun to make as I got to play with so many new things.  It also brought up memories of going to the beach and lake with my family as I grew up and as an adult.  I wish we had an ocean here in Arizona.  Trust me, it gets hot enough to make you really want to go to one.  I will share another sneak peek tomorrow.  Until then, keep stamping and being creative!! 
 
Thanks for stopping by.

Tuesday, April 26, 2011

One More Stain Glass

Okay.  By now you must be thinking I am addicted to this whole stain glass technique.  Well, you are right.  I love to play with glitter and this is one huge way I get to do it.  Now I will admit that my house sparkles in my craft room along with the dog who always seems to be in the wrong place when I glitter and gets it on her.  But I really do not mind.  The result is too wonderful to get upset with a little sparkle. 

Today, I wanted to share with you a stamp I picked up a few years ago at a stamp convention.  This one always reminds me of my husband's grandmother.  She was such a special person especially to my husband.  She was so important to him that the first time I met her, my husband told me that if she did not approve then he would have to rethink our entire relationship.  Lucky for me, I passed with flying colors and grew to love her as if she were my own grandmother.  She passed away in 2006.  She is missed every day.  So when I found this stamp, I had to have it.


She was a true bird lover, especially hummingbirds.  In fact, my husband developed his love of bird watching from being around her.  I love, love, love the look of this card.  I used the Peach Parfait card stock to make my base card.  Once again, I attached it to the whisper white card stock with a corner punch and some strategically placed glue dots.  I also inked the edges of the white with the Peach Parfait ink.  Here is a better look at the bird.

I promise to try to get myself into a different technique soon.  I bet you would love to see some of the new items that will be in the Summer Mini catalog.  Remember, if you have not received one in the mail and would like one just email me.  I would be happy to send you one.  Thanks for stopping by today.  

Monday, April 25, 2011

Stain Glass Butterfly

I hope all of you had a wonderful Easter with lots of fun.  I always get a kick out of coloring eggs with the kids and having close family and friends over to celebrate the resurrection of Jesus.  This year was a little more difficult for me and having my husband and 2 beautiful daughters, as well as their boyfriends, my sister, and my husband's aunt and uncle around really helped me to find peace and joy in the holiday.  I truly wish all of our family could have been together.  I always miss those who cannot attend as well as those who have passed on.  Well, let's get to what you probably stopped by for today.

As I promised, I will be sharing a few more stain glass cards with you all this week.  I took time to take 2 of my pieces and put them onto cards.  The first one I thought I would share with you today is a butterfly.


I really love this stamp.  I wanted to be sure the butterfly would stand out so I chose vivid colors for it to help.  The border has to be one of my favorites too.  I love the gold and chocolate brown alternating around the border.  As you can see I used a corner punch to attach this one to my card.  I so have glue dots on positioned on the darker colors to help adhere it, but mostly the corner punch will hold it on.  I shaded the outside of the white layer with melon mambo ink which is also the color of the base card.

Here is a little closer picture of the butterfly and flower.  I do apologize for the slightly blurry appearance of the picture.  I am not a professional photographer so I am trying to learn how to light the area and get the best shot.  I also had to remember to turn the flash off.  I usually have mine on auto but if the flash goes off when photographing these, the glare of the glitter causes a white spot where the flash reflects.  Who knew?  Oh well, I hope to get much better over time.  
Let me know what you think.  Also if there is a technique you would like me to share, drop me a note.  Thanks for taking time to look today.  See you tomorrow.

Friday, April 22, 2011

Here Comes the Easter Bunny

First and foremost, I wish all of you a glorious Good Friday.  I know for myself and my family, this is a day of reflection and of honoring Jesus for the sacrifice that was made to pave the way for all of us.  Be sure to spend time with your family and to be thankful for all you have.  I know I will.

With Easter just a few days away, I thought I would share with you the cute Bunny Boxes I made this year.


As you can see, I made 4 different ones: Basic Grey, Whisper White, Soft Suede and Basic Black.  The Bunny face and back were made using the Top Note Die for my Big Shot.  They are attached to a Bigz XL Fancy Favor box.  That is another die for the big shot for those who are not familiar with all the dies.  What is nice about this box is not only does the big shot cut out the box, it also scores all the lines which will need to be folded making assembly super easy.   Now onto the Bunny itself.


The ears and feet are the Wide Oval punch.  You need two for the ears.  Then punch 2 large ovals (1 3/4" x 7/8") out of Pretty in Pink for the inside of the ears.  I chose to make each rabbit have colored eyes.  These are made from the 1" circle punch.  The black of the eyes is a 3/4" circle punch.  The cheeks are 1 1/4" circles, dotted using a black fine tip marker.  Now on the black one, I dotted the cheeks with the white gel pen.  The nose is the Small Heart punch in Melon Mambo.  I drew a little mouth on (see it just under the green from the carrot) with the black pen.  Again, use the white gel for the black bunny.  The "hands" were made using a scallop circle, then using the 1" circle punch to punch out 3 scallops to for hands.  1 scallop circle will do both hands.  On his little feet, I used the 3/4" circle punch and 3 circles from the itty bitty punch pack to make the toes.  The carrot is a small oval   (1 3/8" x 5/8") in Pumpkin Pie.  I drew the rings on using the Pumpkin Pie marker.  The leaves are from the Snowflake punch.  One snowflake in Garden Green can be cut in half to make leaves for 2 carrots.   Of course there is one more things this little guy needs:

That's right - a cotton tail.  Pretty simple to make.  They go together quickly.  You may find it hard to believe, but these are actually for my girls and their beaus.  Even though the ages range from 19 - 24, who would not want to get a bunny filled with goodies.  Oh well, I like them.  
I want to wish all of you an Easter full of God's grace and blessings.  Remember to let go of the past and always look to God for the future.  Thanks for stopping by today and I will be back Monday.  HAPPY EASTER!

Thursday, April 21, 2011

Need A Little Pick Up?

Happy Thursday everyone.  I hope all of you are happy and healthy today.  The closer it gets to Easter, the more I truly appreciate all the small things in life.  What a wonderful gift was given to us -- eternal life.  Be sure to take a few moments to remember everything we celebrate Easter for.

As promised, I worked hard to complete a stain glass card to share today.  There are a few differences in this card.  For one, I cut out the stain glass object to attach to the card so you do not have all the acetate.  And two, this card was made using only products from Stampin' Up!.  As you know, I am a Stampin' Up! demonstrator.  While I must admit, I have a lot of products from other companies, I really love the SU! line of products.  Most of my other things came from before I was bitten by the SU! bug.  So it was very important to me to create a card with this technique that you could make using the high quality SU! products. Here it is:


I used a stamp set called Loads of Love for the truck and its cargo of hearts.  They were stamped onto the acetate, glittered, allowed to dry overnight and then trimmed out.  The sparkly hearts are the smallest heart on the Heart to Heart punch, punched out of Real Red and glittered.  They are not stain glass.  This card could be used to send to a friend or a love one just to send happy thoughts their way.  Of course, it would also be good for your sweetheart on Valentine's Day or an anniversary.  Just a change of saying is needed.  I embossed the background with the Big Shot impression folder Perfect Polka Dots.  The edge of the whisper white was punched with Scallop Trim order punch.  The layer for the truck is a 3 1/4" square, punched at the corners first with the Scallop Trim Corner punch, and then the loops connected with the Scallop Trim Border.  I then used the SU! pastels to make the sky and ground.  The saying was stamped and then punched out with the Scallop Square punch.  The then punch 2 more scallop squares in Real Red, cut them in half, trimmed the ends as needed, and layered the pieces around the saying to create the border.  My base card is 4 1/4" x 5 1/2" in Real Red.  Now I will let you see the truck a little closer.


As I am sure you can see, the heart cargo was stamped on the acetate so that it would be able to be cut with the truck.  You do not have to do it that way.  You can stamp them separate and layer them.  They were stamped using Staz-On ink.  The glue used is the 2-way glue pen from SU!.  Even all the glitter came from SU!.  The windshield and side window were glittered using Dazzling Diamond.  The red, silver, and black glitter used for the truck is from a glitter set called Fine Galaxy.  The hearts were done in rose pink and orchid glitter from the set called Fine Cosmo.  Now I have heard a lot of people say they thought that the $13.95 price for a set of glitter was a bit much.  However, you do get 5 colors in each set.  I know that when I have bought glitter from other stores, I usually pay $3 to $5 for one 1/4 oz. container.  So really the SU! price is right on target, and you know the colors will be true and beautiful as well as high quality.  To me, it is definitely worth it.  The truck it attached to the card stock with glue dots.

Next month begins the Summer Mini catalog.  Have you received yours in the mail yet?  If not, contact me and I will be sure to send one your way.  Don't miss out on all the cute items.  Want any of the products used on this card?  Simply let me know and I will get them ordered for you or go to my SU! website listed on this page and you can order online.  Be sure to list me as your demonstrator.

I will be back tomorrow.  Not sure what I will share.  Maybe another stain glass card or maybe a cute Easter box for treats.  Guess you will have to stop by to find out!  Thanks for visiting today.

Wednesday, April 20, 2011

Birthday Invitation

Now just so you know, today's card does not have a stain glass image on it.  I have been stamping images like mad and have several glittered but none are attached to cards yet.  Yesterday was busy as we went shopping for our Easter dinner supplies.  This year we are having about 10 people over for an Easter seafood meal.  That's right.  No traditional ham this year.  We are having one of my family's favorite:  crab legs and shrimp.  We thought it would be fun and the family is excited.  Of course, they will be coloring eggs too for the day and that is always fun.  Needless to say, all my running cut into my card making time.  But have no fear.  I will be back with a stain glass card tomorrow!! 

So for today, I wanted to share this adorable birthday invitation.  One of my sister's friends hired me to make invitations for her little boy's 3rd birthday.  They were having a Cars theme, so I immediately emailed Ellen Kemper, the punch art queen, to see if she had any good ideas for making the car.  Luckily she did.  I used her basic car design and brought Lightning McQueen to life (okay so he is not really alive) on the card. 


Not bad if I do say so myself.  Lightning is made with all punches from Stampin' Up!.  I absolutely love how versatile these punches can be.  The "look who's turning" is from the stamp set of the same name and is stamped on whisper white paper and punched out with the modern label punch.  I layered it onto another modern label punch in pacific point.  The sky background is made with my pastels once again.  The road is a piece of basic black card stock which I drew a white lane line onto with the white gel pen.  The "3" also comes from the Look Who's Turning stamp set.  The pole is a strip of brushed silver card stock.  As for the highway signs with the number on them and the curvy road sign, those came from my wonderful Cricut machine.  Oh, so did Lightning's party hat.  The inside of the card had all the party information.  I was pleased to know they were very happy with the invites.  With all the nephews I have, I am sure I will be able to use this guy again. 

Well, that's all for today.  I will be back to working on stain glass cards today and hopefully have one to share with you tomorrow.  Thanks for stopping by.

Tuesday, April 19, 2011

Stain Glass Again!!!

I spent quite a bit of time this past weekend stamping images for my stain glass card collection.  Over the years, I have acquired several stamps that are really made for the stain glass technique.  The background looks like a stain glass window.   Today, I wanted to show you another stamp that while not specifically made for this technique, it works beautifully.


This lily stamp has been used quite a bit over the years.  Forgive me Stampin' Up! because it does not come from you.  I originally bought this one because of the beautiful flower and because, sad to say, I thought it would work wonderfully for a sympathy card.  I have used it a lot for that over the years.  I wish that were not the case but that is a part of all lives.  When putting this particular card together, I was thinking it would make a nice card to send to a friend just to say hello.  I used my trusty pastels to create a soft blue background.  The frame I made for the lily is from the Top Note die for the Big Shot.  You can get this fun die from me through Stampin' Up!  I added the glitter to the frame to make it have a little more dimension.  Let's take a closer look at the lily.

They are so sparkly!!!  I just love it.  My sister would say "that's so tinsel" from the Disney holiday television special called Prep and Landing.   I must say I too enjoy that saying. 

Now if you are wondering how I attached the acetate to the frame, I used glue dots.  Unfortunately with acetate,  no matter what adhesive you use, it shows through unless it is a spot where the image is stamped solid or glittered.  But if you have worked with glitter, it is not easy to put adhesive on it and get it to adhere securely to the card.  That is why I leave a border around most of the stain glass stamped images I make.  Then I simply make my frame so I can attach the acetate using the glue dots.

Hopefully, you will feel brave and give this technique a try.  If you have any questions, let me know.  It really does make for a beautiful, one of a kind card.  Until tomorrow, thanks for stopping by. 


Monday, April 18, 2011

Can A Card Ever Sparkle Too Much?

A few years back, I was in a craft store looking at all the samples they had.  I happen to come across a card that was the most beautiful technique I had ever seen.  It was very sparkly with all the glitter used on it.  I knew immediately I had to find out what the technique was called and how to do it.  Well as luck would have it, the store owner was very nice and offered to tell me all about it.  The technique is called Stained Glass.  Here is a sample:


It quickly became one of my favorite techniques to use.  This is one I made a while ago but kept as a sample for myself.  You see while the owner was kind enough to share with me, she had no written instructions.  So basically, I listened, bought a cool stamp to try it out, and came home ready to attack.  It took several trial and errors but I finally got the hang of it.  Let me show you a close up of the "glass".

Now you can do this technique on card stock but I prefer to use acetate.  You begin by stamping your image onto the acetate using a permanent, fast drying ink.  I use StazOn.  I do allow it time to sit before I begin working on it just to make sure it is completely dry.  Then let the fun begin!  Using a 2 way glue pen or any clear drying glue you have, apply glue to an area.  Do not apply to the whole image, just the area you are ready to glitter.  For example, the background panes I knew I wanted in dazzling diamond glitter.  So I began by putting glue onto the pane areas.  Since they were all going to be in the same glitter I could do them all at one time.  Once the glue is on, sprinkle your glitter over the area.  Shake off the excess.  I usually allow each area a few minutes to set and begin to dry before moving onto the next color of glitter.  I also begin with the lightest color and work towards the darkest.  You will need to allow this to dry completely once you finish before you can attach it to your card.  Trust me, you will love the outcome of this one.  I am currently working on some more of these beautiful cards so expect to see some other examples soon.  Thanks for dropping in today.

Friday, April 15, 2011

Simple Pop-Up Card

The other day, I shared with you a pop-up princess card I made for my niece.  It is one of the more difficult types of card that I make due to the crazy folds and making sure all the pieces inside fold the right way.  Today I though I would share a simple pop-up card that anyone can make. I chose to do a birthday theme because it always seems birthdays come up and catch off guard.  Now I have this is reserve.


I used a stamp set from Stampin' Up! called Crazy for Cupcakes (there's that cupcake theme again).  I also am a fan of polka dots.  They are just fun to look at.  My base card is Crumb Cake cut at 5 1/2" x 8 1/2", scored at 4 1/4".  They layer is Concord Crush, one of the In-Colors cut at 4" x 5 1/4".  I used  Crumb Cake, Concord Crush, Daffodil Delight, Tangerine Tango, and Very Vanilla for the dots.  They were punched in 3 sizes - 3/4"circle, 1/2" circle, and the circle from the itty bitty punch pack.  Since the layer is Concord Crush, I did not punch that color in 3/4".  The cupcakes were stamped on Very Vanilla and colored using the Stampin' Markers.  It was then trimmed out and adhered to the front with dimensionals.

Now for the inside.


I carried the theme from the front in here with the polka dots.  The cupcake is from the same stamp set, stamped, colored and cut out.  Now lets talk about the pop-up part of the card.  I cut a piece of Concord Crush at 5 1/4" x 8", scored at 4".  I then used my word window punch to make the pop-up.  Simply push the word window into the middle of the card, lining up the score line with the center of the punch.  Punch it out.  Then repeat it on the other side.  Use a stylus to connect the punches in the center of the card and push the middle out.  That's it.  Very basic but it adds dimension to your card.  I put adhesive on the bottom portion of the cupcake and adhered it to the pop-up part.  A friend of mine first showed me how to do this and I wanted to share it with all of you.  I did want to share a close up of the Happy Birthday tag with you.

I created it using the decorative label punch.  The layers are (from top to bottom) Very Vanilla, Concord Crush, and Crumb Cake.  Stamp your greeting and punch it out.  Then punch 2 of each of the other colors.  Cut one of each color lengthwise, and the other of each color width wise.  You will need to trim a little off each piece but then you can layer it and create a framed effect.  Since you have the layers it elevates the tag.  No need for dimensionals.  

Well that's it for this Friday.  Have a great weekend and be sure to stop by Monday.  Thanks for dropping by today.  
 

Thursday, April 14, 2011

Cupcakes Anyone?

I am a big fan of cupcakes.  In fact in my house, if cake is to be had for birthdays, it is almost always cupcakes.  I love to watch cupcake food show such as Cupcake Wars on the Food Network and DC Cupcakes on TLC.  So imagine my excitement when Stampin' Up! put out their Create a Cupcake stamp set and Build a Cupcake punch.  By the way, they are both in the Occasions Mini catalog so if you like them, order soon.  The catalog expires May 1.  Of course I ordered both very quickly myself and have been in cupcake heaven since.  This is a card that I made using both tools, stamps and punch.


The "wrappers" on the cupcake and the frosting and sprinkles come from the stamp set.  I stamped the wrappers (Baja Breeze, Pink Pirouette, and Early Espresso), then used the punch to punch them out.  I then stamped the frosting in 3 colors (Baja Breeze, Very Vanilla, and Pink Pirouette)  added the sprinkles (Early Espresso), and punched them out.  Then simple layering put my cupcakes together.   The cherries are from the punch.  I used a scrap piece of real red card stock to get the color I wanted.   Even the hearts (stamped in Baja Breeze, Pink Pirouette, Early Espresso)  in the background are from the cupcake set.  The card stock is Very Vanilla, layered on a piece of Baja Breeze which has been embossed using an impressions folder called Perfect Polka Dots and the Big Shot.I stamped the Happy Birthday in Early Espresso on Very Vanilla card stock and punched it out with the Word Window punch.  I then layered that onto a piece of Early Espresso that was punched out with the Modern Label punch.  The base card is Pink Pirouette.  Simple but nice and easy to make.  Of course, you may crave cupcakes after this.  For that, I cannot be held responsible.  Thanks for stopping by today.

Wednesday, April 13, 2011

It's T-I-Double G-ER

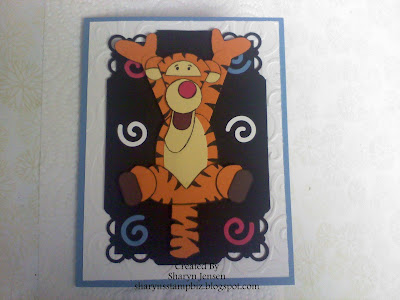
Both of my girls loved Winnie the Pooh when they were growing up and still have favorite characters today.  When my husband and I married, I was lucky to get in-laws who also love Disney characters including the Hundred Acre Wood residents.  So it was only natural when I saw the beautiful punch art on Ellen Kemper's site to want to try to learn how to make Pooh and his friends.  It was going to be my sister-in-law's birthday so I decided to start with her favorite, Tigger.


Now this is one first attempt that I am really proud of.  There were a lot of details to try to include and I definitely practiced my patience.  Several pieces took more than one attempt for me to get just right, but all in all I was extremely happy with the final result.  Here is a closer look at Tigger:


There are so many steps to making him that I am not going to list them here.  If you are interested in the recipe for him, send me an email and I will either email it to you or do another post with it included.  Of course, you can always visit Ellen's blog and see her adorable punch art items.  

Be sure to leave a comment to let me know how I am doing.  If there is anything you want to see, please let me know.  If I can do it, I will.  Thanks for dropping by today.

Tuesday, April 12, 2011

Graduation Season is at Hand

Last year was a big year for our family as our youngest daughter, Kaitlyn, graduated from high school.  We also celebrated the graduation of our adopted daughter (our oldest daughter's best friend), Marissa from NAU in December.  Now I went traditional for Kaitlyn and ordered her announcements through the appointed company from the high school.  However, when Marissa came to me on Thanksgiving and said she wanted me to make her announcements, well I just could not pass up that opportunity.  I wanted to be able to take part in her celebration.  After all finishing college is quite an achievement.  I made them simple and elegant to fit the occasion.


I stuck with the traditional colors of NAU to create the letters and other items used on the announcement.  Then I layered the letters.  I liked the look of the dark blue on top so that's what I went with.  The hat and the graduation definition on the front are from a stamp set called Go Graduate.  Unfortunately this set is now retired.  I still use it for cards for friends or create announcements ordered by others.  Yes you can contact me to order announcements.  Please know I need at least one to two months to create them depending on how many you need.  Now for the inside of the announcement.


I had Marissa email me pictures of her in her cap and gown.  She sent 4 or 5 and had me choose which one I thought would look best.  I printed them on my printer since she only needed 20 or so.  I used corner punch for the frame which allowed me to fasten the picture in by sliding the corners under the punched out part of the corner.  This allows the recipient to choose to keep the announcement intact as it is or remove the picture to put in a scrapbook or frame.  The punched out pieces were used on the corner of the announcement part so no piece was wasted.  The wording for the announcement came from researching online and looking at samples.  I then sent as I always do the wording to Marissa for approval.  Yes these took some time to make but once they were complete, I was really proud of them.  Her parents liked them so much they doubled the order and sent them to more family and friends.  I was thrilled they liked them so much.

Keep stopping in to see new things each weekday.  Leave some feedback for me if you have time.  Thanks for dropping by.

Monday, April 11, 2011

Princess Coach

Every little girl loves to think she is a princess.  They play dress up and have tea parties and love to go to Disneyland and actually meet the princesses.  Well, my niece, Miss Kara, is no exception.  She is a truly delightful little girl to be around and she does love the whole princess theme.  So for her birthday, I wanted to make her a card that would reflect this theme.  I decided Cinderella's coach was a good place to start.  Luckily, someone else had made a coach and I could look to theirs for some guidance (I just wish I could remember who it was).  After a lot of trial and error, I finally made one I thought looked pretty good.


I added the Princess sticker because I wanted Kara to know that she is a princess.  The coach was not hard to make at all.  I used the wide oval punch to make the body of the coach.  I had embossed the paper with my big shot using the Elegant Lines embossing folder.  I then used the Heart to Heart punch to get the upper part of the door from the small heart and the wide, medium sized heart.  I used the large oval (also known as 1 3/4" x 7/8") and trimmed it down for the door.  The "wheels" are from the Sizzlit die called Scribbles Swirls.  The "seats" for the coachman were made using the retired horizontal slot punch, but scrap paper would work too. 

Of course, I did not want to leave the card without a princess but Kara does not really have a favorite.  She loves them all.  So I used the sticker set the Princess sticker came from, and decided to make a princess pop-up card that had many of the princesses.


Just like always, I needed to add glitter.  I mean what card is complete without it?  So I glittered portions of the coach and glittered the inside border of the card.  Now since these are stickers, I did not want the parts that were free to stick to anything so I put baby powder on the back of these and then used glue dots to make sure the princesses stayed stuck to the card.  I love this card.  I have made a few pop-ups over the years but this one was so much fun and so special because of who it was for.  
Hope you enjoyed seeing this.  Be sure to stop in again and thanks for coming by today. 

Friday, April 8, 2011

Here Kitty Kitty

My youngest daughter loves all kinds of animals but I would say her favorite is cats with dogs running a close second.  She would love to have a cat.  But unfortunately my husband is extremely allergic to them.  Even going into someones home who has a cat for just a few minutes causes his allergies to kick in.  I am surprised he has this strong of a reaction since he grew up in a home that always had a cat in residence.  Guess his allergy really developed after he grew up.  Anyway, I wanted to learn to make a cat from punches.  Believe it or not, I played around and came up with one for Halloween.  Then I happened upon Ellen Kemper's blog and low and behold, she had the same cat.  I am betting I saw it there at sometime, forgot it, and then channeled it as I was being "creative".  Ellen is a superstar punch artist.  I made the Halloween kitty with a mask and all for my niece and did not get a picture of it.  So when my aunt asked about a cat card the other day, I thought I would make the same kitty, just put her on a birthday card.


I really like this cat.  She is very easy to make.  Her body is the word window punch; her face is the large oval (now called the 1 3/4" x 7/8" oval)punch; her ears and legs are the 5-petal flower punch; the tail is a piece of the side of the large oval hole that I punched with the large oval again; her eyes are the circle from, you guessed it, the itty bitty punch pack; her nose is a 1/4" circle - this punch is retired, you could use a circle from the 2 step owl if needed; and her collar is from the now retired horizontal slot punch but a piece of scrap paper would also work.  I embossed the background with the Petals-A-Plenty embossing folder using my big shot.  I then colored the center dots of the flowers using a white gel pen.

Any cat lover would like this one.  My daughter gave it her approval (she is my toughest critic) so I knew I did a good job.  Hope you like her as much as I do.  Thanks for stopping by.

Thursday, April 7, 2011

Happy Birthday Cake

The other day, I shared with you a wedding cake made of 3 tiers for a wedding card.  Today I wanted to show you how you can take the same cake, use only 2 tiers and create a cute birthday cake for a card. 


Cute isn't it?  I used the bottom 2 tiers of the wedding cake only so I would have room to place some candles on the top.  While the tiers were made using scrap pieces of paper, the candles and polka dots were made using the Build A Cupcake punch.  This punch is so nice to use for a variety of punch art creations.  I used the dots from it and the candle and flame.  My color scheme is whisper white, tempting turquoise, and pumkin pie.  The glitter I used for the frosting came from the Stampin' Up!.  The turquoise glitter is part of the Fine Cosmo glitter set.  The orange comes from the Fine Supernova glitter set.  I punched the flames out of daffodil delight and added some dazzling diamond glitter to them.  It is easier to see in the close up of the cake.


I embossed the whisper white with the tulip frame and the pumpkin background with the perfect polka dots.  The tag is from the Tiny Tags stamp set.  I stamped the turquoise dots, then the 4 You using pumpkin pie.  I punch it out with the Jewelry Tag Medium.  It is attached to a piece of tempting turquoise 1/4" grosgrain ribbon with a gold brad.  Easy card to make and fun to look at.  Hope you like it.  Thanks for stopping by.

Wednesday, April 6, 2011

Heart to Heart Wedding Card

Hi everyone.  I wanted to share another wedding card that could be used as either an invitation or a card for the happy couple.


I love the look of the tuxedo for the groom and the dress with pearls for the bride.  I made this sample as I was preparing to meet with a bride to discuss her wedding invitations.  That is why I used the "You're Invited" stamp on it instead of a congratulations.  I used my full heart punch as well as a heart for the big shot the is part of the Movers and Shapers set called Punch Windows.  It pairs very well with the full heart because it is just a little bigger that it so you can layer.  The groom did not need an entire full heart to make his shirt so I punched it and trimmed it to fit.  I added the "buttons" on the shirt with a black pen.  His bow tie is a small piece of 1/4" basic black grosgrain ribbon tied into a knot.  For the bride, I embossed the full heart of her dress with the same impression folder as the background of the card.  It is called Finial Press.  I then added the pearls because, well as I have said before, I seem to associate pearls with weddings.  

So there you have it.  A simple, easy to make wedding card.  Feel free to try it.  Thanks for dropping in today.

Tuesday, April 5, 2011

Another Wedding Card

The other day I was trying to come up with a card to send to a couple who is getting married.  I have made a few and while I like them I wanted to make something different.  I was browsing through a demonstrator site and happened to see this really cool birthday cake.  It was two tiers and looked like it would be fun to make.  So I started playing with my card stock and decided to do a three tier wedding cake for the happy couple.  Of course, it needed a cake topper and I decided wedding rings would be perfect.  Here is the card I designed:


I of course added glitter to my cake and some pearls.  Each layer of cake is simply a piece of whisper white card stock with 2 corners rounded.  Then circle punches are used to make the "frosting" draped on the sides.  I used the cross looking flower punch from the itty bitty punch set to line the bottom of each tier.  Maybe this closer picture will show that better:

I guess not.  It is all white which makes it hard to see but each pearl is placed in the middle of the flower.  I embossed the background with an impression folder and my Big Shot, then put some doodle dots on it for fun.  The rings were made using the brushed silver card stock from Stampin' Up!.  The brushed gold would work well too.  I punched a circle using the circle from the itty bitty set (if you have not guessed by now, I love this set of punches!!), then punched a 1/2" circle around the hole.  I snipped one ring on one side so I could hook them together and added a diamond for the bride.  It is always nice to come up with new ideas to use for weddings.  Hope you liked this one.  Thanks for stopping in.

Monday, April 4, 2011

My Favorite Princess

Of all the Disney princesses (is that spelled right?) my absolute favorite is Belle from Beauty and the Beast.  I guess I felt I related to her most of all because of her love of books and love of family.  She was willing to give up herself to help her father.  I can understand that.  I wanted to be a teacher from the time I was 5 and I was lucky enough to get to do it.  But I gave all that up when my mom became ill in 2004.  So I could really understand her motivation to help family. 

What does this have to do with stamping you ask?  Well, the other day I pulled out my Totally Tess stamp set.  I love all the demonstrator gadgets you can stamp with this set.  Tess looks so great in her apron!  I have seen her dressed in many ways including as Cinderella.  I wish I could remember who made her up as Cindy but it escapes me right now.  If you know please tell me so I can give them credit.  As I was looking at Tess and thinking how cute she was as Cindy, I thought why not dress her as Belle.  Now remember this was my first attempt at it so be nice.


Now I thought she turned out rather well.  I cut the dress from a scrap of Daffodil Delight paper and glittered it.  I can thing of one little girl I know who would really like this card.  Let me show you a closer look at Belle.


The ruffle on her dress was made by punching a circle with the circle from the itty bitty punch pack, then punching a 1/2" circle around it.  I then took the rings and cut them in half, glued them down on her dress prior to glittering, added glitter to the entire dress, and added a couple of diamonds to accentuate the ruffle.  The hardest part of this was making a template of a dress  for her.  I had to make sure I cut the piece out for her hair to show on her shoulder.  I colored her skin with a colored pencil and made the gloves by coloring in her arms most of the way up with the Daffodil Delight marker.  I have a habit of confusing people as well as myself sometimes so if you need further instructions, just let me know and I will do my best to get them for you.  

I cannot wait to try to dress Tess up as some of the other Disney princesses.  She will be ready for the ball before you know it.  Thanks for stopping in today.  See you tomorrow.

Friday, April 1, 2011

Mr. and Mrs. Potato Head

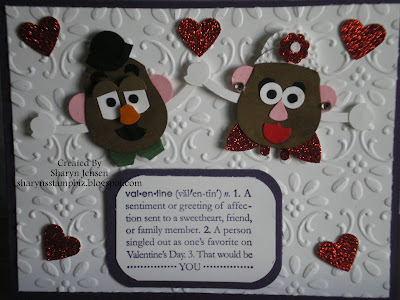
Did you ever have a Mr. Potato Head when you were growing up?  Or maybe you had one for your children.  I remember playing with this toy especially with my kids.  We had so much fun changing his eyes, ears, and all the other parts.  When the movie Toy Story came out, there was a renewed interest in this toy.  Suddenly he started popping up everywhere, including on the blog of fellow stamper Ellen Kemper.  She has to be the most inspiring punch artist I have seen.  So I decided to make a cute Valentine card this year using not only Mr. Potato Head, but also his lovely wife Mrs. Potato Head.


I had so much fun making this.  I will tell you this is not for the beginning puncher or for someone with no patience.  It has lots of parts and takes time to put together.  I have used these little guys on wedding cards, birthday cards, money cards, and invitations.  I just love them.  It never fails to see a smile creep onto the face of the receiver as soon as they spot the Potato Heads.  Of course, you do not have to use both of them.  You can always just do one.  If you are interested in the recipe for this one, let me know.  I can always post it for you or email it to you.  I hope you have enjoyed seeing a glimpse of childhood today.  Thanks for stopping by.