CARDS FOR SALE

Most cards you see on this site are available for purchase. Simply click the Pay Now button at the bottom of the post of an available card to purchase the card. You will be linked to PayPal for payment. It will come up as "greensnaggletooth@cox.net" which is the name of my internet company. Price is $5.00 unless otherwise stated and includes shipping. Your card will come with an envelope also. Email me with any questions or requests at: sharynsstampbiz@gmail.com
Thanks for taking a look at my creations!!

Monday, April 29, 2013

More Mario Friends

Hi everyone and welcome to a new week.  I do hope you all had a wonderful weekend.  I took my sister to the beauty salon for our monthly hair appointment.  She did very well with all the up and down to get in and out of the chairs.  It was nice for her to get out though.

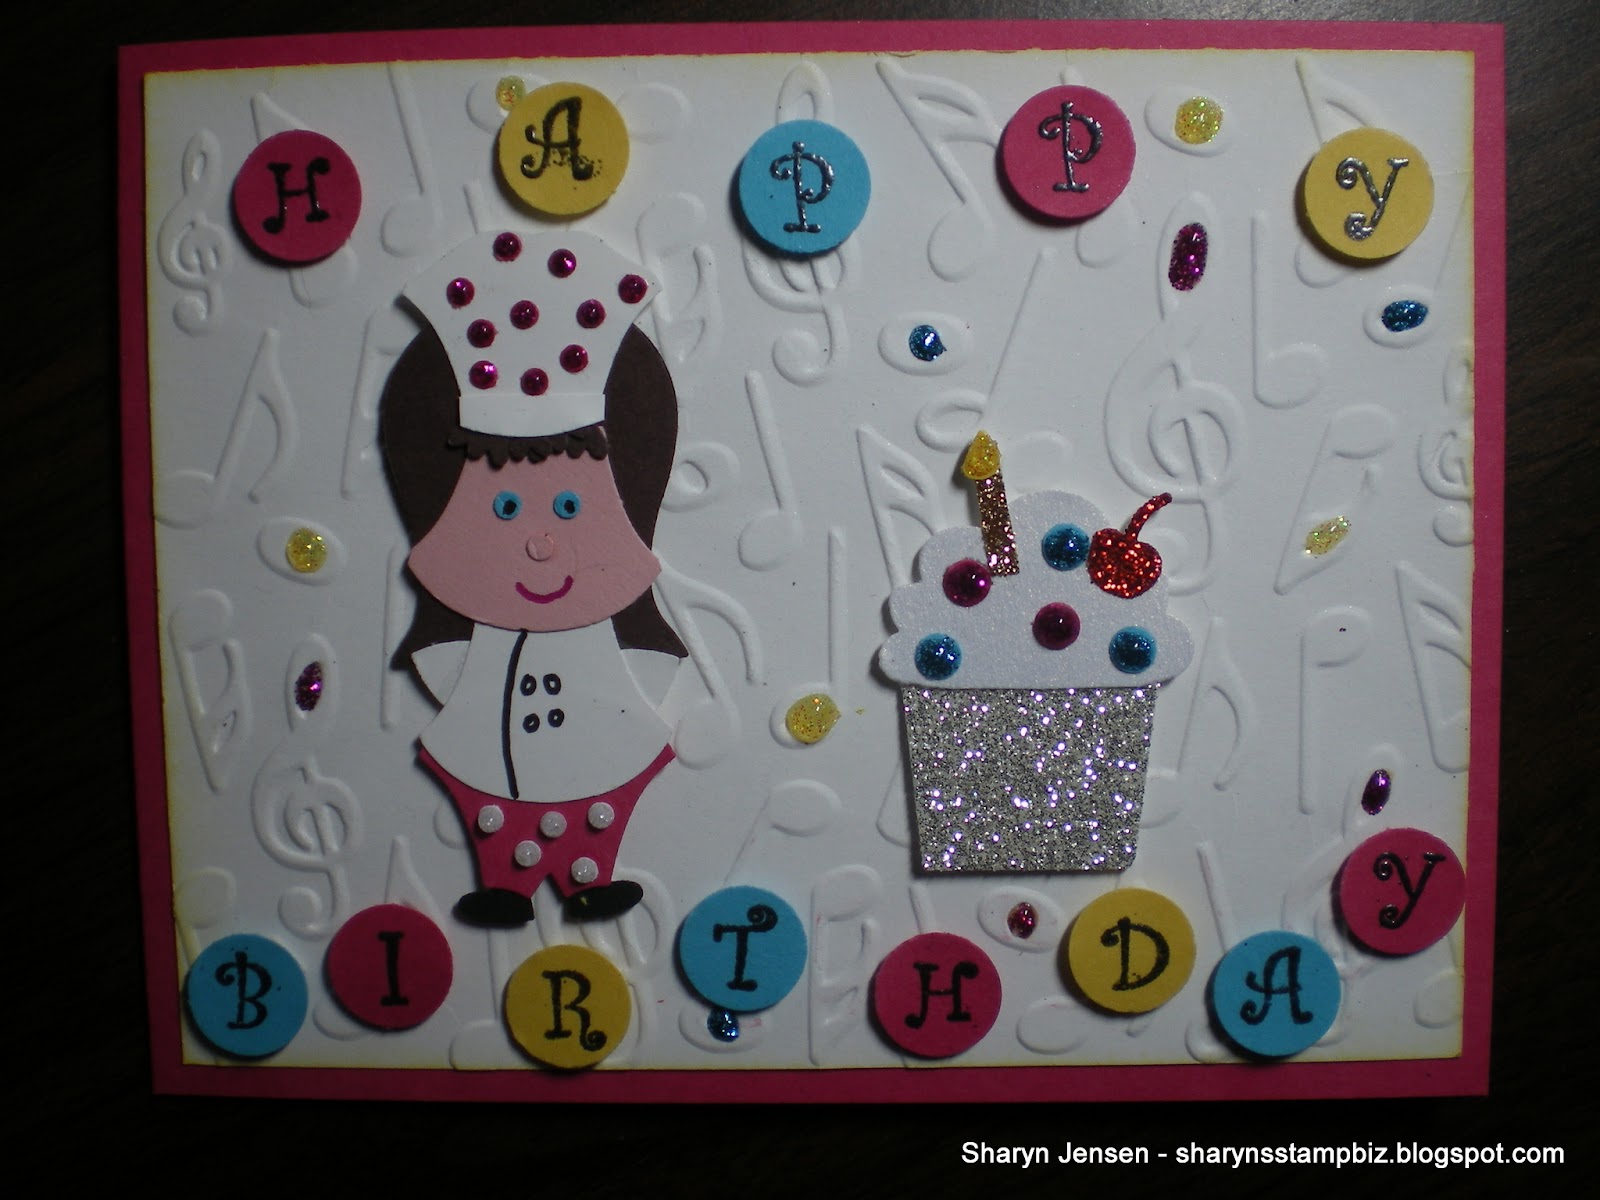
I did find time to get into my craft room to do a bit of card making.  I decided to continue with the Mario friends and make the little mushroom guys.  Again I want to thank Heather Summers for her wonderful tutorial on these.  Let me show you my card and we will get started.


I started with a base card of Real Red card stock cut at 4 1/4" x 11", scored at 5 1/2".  Next I added a layer of Basic Black measuring 4 1/8" x 5 3/8" card stock to this with runner adhesive.  The top layer is a piece of Bashful Blue card stock cut at 4" x 5 1/4".  I ran this through the big shot using my cloudy day impression folder.  Next I took a piece of Garden Green 4" wide and tore a strip across it.  I attached it to the cloudy day blue using runner adhesive.  I then added dazzling diamond glitter to the torn edge of the green and colored the clouds in using a white colored pencil.  The finished piece was attached to the card using runner adhesive.  I punched the stars out of Daffodil Delight using a small star punch from the holiday punch pack.  I added little eyes and mouths to these with a fine tip black marker.  I attached these to the card with glue dots.


These cute little toadstools are so easy to make.  The hat is a 1 3/4" circle out of Real Red card stock that has been repunched with the 1" circle punch.  The smaller circles on the red are 3/4" Whisper White circles.  I ran these through my big shot using my medium dots impression folder.  I attached the white dots to the red using liquid glue.  I trimmed any of the white circles that were hanging over the edge of the red with scissors.  The face is a 1" circle punched out of Pink Pirouette.  I glued the red hat on with a 2 way glue pen and flattened the bottoms with scissors.  The Basic Black of the eyes were punched out using the retired horizontal slot punch.  You could make these using scraps if you do not have the punch.  The whites of the eyes are 1/8" circles.  They are attached to the black with liquid glue and the finished eyes are attached to the face with the same liquid glue.  The completed toadstools are attached to the card using dimensionals.


The greeting I chose for this card is from the retired King of the Grill stamp set.  I stamped it using Real Red ink onto Whisper White card stock and punched it out using the small oval punch.  I attached that to a large oval which had been punched out of Real Red card stock.  It is attached to the card using dimensionals.

Now I think the only other character I can think of to do from this group is Princess Peach.  I am not sure I am going to do her right now.  I am kind of ready to move on to another topic.  I guess I will have to think about it and see.  

That's it for today.  I hope your week is off to a good start.  I will be back tomorrow with another card to share with you.  Thanks for stopping by today!!

Friday, April 26, 2013

Here's Yoshi!!!

Happy Friday everyone!!  It's also happy Jackson day for me!!!!  I have so much fun playing with Jackson.  He is almost 8 months old and getting so big already.  Playing with him brings back memories of when my girls were little.  It is truly amazing to think how quickly the time has passed. 

Again I want to apologize for not having a blog for you yesterday.  I was surprised at everything popped up and took so much time.  I was exhausted when I got home - in fact I was too tired to sleep and did not go to bed until after 1 am.  Crazy!!!!

As promised, I decided to give the pink Yoshi a try.  Now I chose to do the regular Yoshi and not make him any other colors for my first try.  I want to thank Heather Summers for sharing the pink one as well as all the instructions to make this guy.  Let me show you my card and we will get started!!


Well here he is.  I will focus on Yoshi in a moment but for now let's focus on the basic card.  I started with a base card of Tangerine Tango cut at 5 1/2" x 8 1/2", scored at 4 1/4".   I then cut a 4 1/8" x 5 3/8" piece of Wild Wasabi and sponged the edges of it with wasabi ink.  I attached it to the base card with runner adhesive.  I then cut a piece of Whisper White card stock at 4" x 5 1/8".  I ran this piece through the big shot using the tiny stars impression folder (not a Stampin' Up! product), sponged the edges with tangerine and wasabi ink and attached it to the card using the runner adhesive.  I added bright green rhinestones to the card after I attached Yoshi.


Here is a close up of the background so you can see the stars and rhinestones.  I just wanted to add a bit of jazz to it.  


Now onto Yoshi.  I chose to use the following colors to make him:  Basic Black, Whisper White, Tangerine Tango, Wild Wasabi and Certainly Celery.  Now I could list all the punches but since this is Heather Summers project and she has already listed these, I am going to refer you to her site for the instructions.  Click here to go to her site.  There is also a video for you to see there which helps explain how to create him.

Thanks so much for coming by to visit today.  I hope you all have a wonderful weekend.  I will see you on Monday.  Wonder what I will make to share with you?  Guess you will have to stop by to see!!  See you all then!!!!

Thursday, April 25, 2013

Where Did The Day Go?

Hi everyone.  I had every intention of having a card to share with you today.  However, I failed in my mission.  Nothing went the way it was planned and the next thing I knew I found myself sitting here just after midnight typing this to you. I haven't even been home a whole hour yet.  The best thing about today was I spent time with my daughter and my nephew, Jackson.

I hope you can forgive me. Today will have craft time so I should be back tomorrow with a card to share. Thanks for understanding.  See you tomorrow.

Wednesday, April 24, 2013

Wacky Day

Happy Wednesday to you all!!!!  Well I must say my day did not go exactly as planned yesterday.  It got off to a good start but then my dog apparently ate something she should not have.  Now we all know when a doggy has an upset tummy they like to eat grass.  Well because of my hubby's allergies, we do not have grass in either the front or back yard.  We did desert landscaping in both so he could breath easier.  Since she could not find any grass to eat, she decided to eat the leaves off all my vegetable plants.  Needless to say I was not happy with her at all!!  It is hard enough to grow veggies in my yard because the soil is so bad.  We have to do container gardening and we are still pretty new to that.  So to have her destroy my plants was just heart breaking. 

Once I cleaned up all the leaves from the patio, I came in and started thinking about what character I wanted to make out of punches for you.  My daughter had asked me to do Yoshi, another Mario character.  I thought I would see if anyone had ever done him before so I googled it.  Up popped some of the cutest punch art featuring him as well as other characters too.  In fact it is so cute I decided to share some of the photos with you today and save mine for tomorrow or Friday.  Here are just some of the wonderful Mario punch art characters that I saw:


I threw the Toadstool guy in at the end because I love him!!  I absolutely have to give this one a try!

The pink Yoshi is nice because it includes all the directions to make it.  Maybe I will give this one a try first.  While pink is my favorite color, I will either do a different pink scheme or a completely different color.  Maybe I will do him in original Yoshi colors!!

That's it for now.  I hope you enjoyed seeing these and will give one a try.  I will return tomorrow with my creation for you to see.  Thanks for stopping by today!!!


Tuesday, April 23, 2013

Another Punch Art Friend

Happy Tuesday everyone!!!!  My week was off to a jump start yesterday, literally!  My daughter's boyfriend called in need of a jump start for his car.  So I was out the door before 7 am.  Once his car started, I headed home but made a few stops first.  A trip to the gas station, the grocery store, Target and the bank were in order and I figured I might as well take care of all of them while I was out.  I did manage to get back home before 10 so I felt really good.  Have you ever noticed that when you get home from the grocery store there is always work to do?  I cleaned all the produce and put all the groceries away and then had to take out trash and start laundry.  I was exhausted but still wanted to work on a card. 

The card I worked on was an easy one to make because it is patterned after a card I made last week.  Do you remember Mario from last week?  Well when my daughter came over and saw him she thought he was too cute and said I needed to make a Luigi to go with him.  That's exactly what I did!!


I started with a base card of Crumb Cake cut at 5 1/2" x 8 1/2", scored at 4 1/4".  I added a layer of Blushing Bride which is retired (but might reappear again soon!!) to the top of the Crumb Cake.  It is cut at 4" x 5 1/4" and attached using runner adhesive.  


To make the hat portion, I used Whisper White and Garden Green card stock.  I cut a piece of green to measure 2 1/2" x 4" and adhered it to the top of the Blushing Bride using runner adhesive.  I used the retired decorative strip called Billboard and cut out the letter "L".  It is adhered to a white 1 1/4" circle using liquid glue.  The circle is then adhered to the hat with runner adhesive.  The brim of the hat is the 3rd smallest oval from the oval framelits collection.  I cut it out using the big shot and then cut it a little larger than half.  I attached a large oval with the greeting on it to the brim with runner adhesive.  The greeting is from the retired Stamp Set called King of the Grill.  It is stamped in Garden Green ink.  Once it was attached to the brim, I attached the brim to the hat with dimensionals.


To make the face, I used Whisper White, Basic Black, Pacific Point and retired Blushing Bride card stock.  The eyes were made using the wide oval for the white, the large oval for the pacific and the retired small oval for the black.  I layered these together using runner adhesive and attached the completed eyes to the face with the same adhesive.  The moustache was made using the wide oval punch.  I punched 2 of these ovals, ran then through the big shot using the woodgrain impression folder and cut each one to be a little larger than half.  They are attached to the face with runner adhesive.  The nose is a wide oval and is attached using dimensionals.  I added a bit of white gel pen to the nose and eyes for looks.  I also sponged the edges of the nose with Blushing Bride ink for depth.


Here are the brother together.  The main difference other than the letter on their hats and the color of the hats is the moustaches.   Mario has a wavy one which is why I used 2 sizes of circle to make it while Luigi has a pretty straight one.  The wide oval worked really well for his.  

Well that's it for today.  Wonder what I should make for tomorrow?  I guess I had better get to thinking about that so I can get to work.  I hope you all have a terrific day and will come by to visit with me tomorrow.  Thanks for dropping by today!!

Monday, April 22, 2013

An Old Friend For A Masculine Card

Hi everyone and happy Monday!!!  I hope you all had a wonderful weekend.  Well my sister now has her hard cast on her foot.  She chose purple for it.  I think it is more comfortable but still not fun to have on.  I spent my weekend visiting with her and taking care of my hubby.  He often suffers from neck pain and this past Saturday was no exception.  I am happy to report that he is feeling better now and I hope it continues.

For my share today, I have made another masculine card.  I have often talked about how I always run short of these.  Since I love to do punch art, I have decided to make several of the same characters for cards for men.  Today's card features one of those character.  I do actually think this card is very similar to one I made before.  I do apologize for that but hey it works and I like it.  Let's just jump in shall we?


It's our old friend Yosemite Sam from the Looney Toon family.  I started him with a base card of Cherry Cobbler measuring 4 1/4" x 11".  I scored this at 5 1/2", creasing my score line with my bone folder.  I then stamped the background onto a piece of Very Vanilla and prepared it for the card.  I took another piece of Very Vanilla measuring 4" x 5 1/4" and ran it through my big shot using the top note die.  I used the negative piece, the frame, from this and set the top note aside for another day.  I then ran the negative through the big shot using the impression folder called Chevron.  I glued this using a liquid glue to the stamped image and attached the entire piece to the base card using glue dots.


Here is a closer look at the stamped image.  Now I stamped this using StazOn ink onto Very Vanilla card stock.  However, this image turned out fairly light and I did not think it would look good.  I could have stamped it again but I decided to take a fine tip black marker and outline all the lines instead.  I think it looks just as good and saved card stock by doing this.  I colored the image in using colored pencils.  I always think about using markers, but sometimes, it just does not seem like the right medium to use.  I was afraid it would take away from the actual image and not allow Sam to stand out.  I added what looks like red water drops to the corners of the vanilla frame just for added color.


Now for the star himself.  I first learned to make Sam from Ellen Kemper.  I used Crumb Cake, Cherry Cobbler, So Saffron, Night of Navy, Soft Suede, Whisper White, Basic Black, Pumpkin Pie, Brushed Silver and the retired Blushing Bride card stock.  Here is the list of punches used for all the pieces of Sam:

Hat - 2 1/2" circle trimmed on the sides

Head - 1" circle in black

Eyebrows - narrow heart from the retired Heart to Heart 

Eyes - plus sign looking flower from the itty bitty punch pack trimmed 

Moustache - full heart cut in half and trimmed 

Nose - word window re-punched to make it shorter

Ears - small heart from the retired heart to heart punch cut in half

Body - full heart trimmed

Arms - wide oval punched around the retired small oval hole

Hands - modern label; punch the ends of this using the 1/2" circle punch

Legs - 1 3/8" circle punched near a 1" circle hole

Belt - large oval punched near a large oval hole

Buckle - scrap of card stock; draw detail on if you would like to

Kerchief - 1/4" circle and the small heart from the retired heart to heart punch (cut heart in half)

Boots - smallest heart from the retired heart to heart punch trimmed

I adhered all pieces of Sam using a liquid glue.  I also added crystal effects to the boots to make them shiny.  The finished Sam is attached to the card using dimensionals.  

I do hope your week is off to a good start.  I am hoping to spend time doing things I love.  I guess we will see how it goes.  Thanks for dropping by today and I will see you tomorrow. 

Friday, April 19, 2013

A Video Game Friend

Hi everyone and it's Friday!!!!!!!!  We have reached the end of another week.  I will be taking my sister to her doctor this afternoon for her follow up appointment.  When they did the surgery, they only put a half cast on her foot to allow for any swelling that would occur.  Today, they will remove that cast and put her in a full cast.  I hope it will be easier for her to move around.


Today is my day to spend the entire morning with little Jackson.  I was thinking about him yesterday when I sat down to make my card for today.  I really was thinking how I need to get more boy themed cards to have on hand.  I remembered a card I found on Pinterest a few weeks ago made by Leena Girsa.  I decided to give it a try myself so let me show you the card.


Now for any of you out there who love video games or have children who love video games I am sure your recognize Mario.  My daughters still play video games with him in them.  I started with a 5 1/2" x 8 1/2" Pacific Point piece of card stock.  I scored it at 4 1/4".  I then cut a piece of the retired Blushing Bride (which by the way will be making a come back soon) cut at 4" x 5 1/4".  This would be the first layer of my card and serve as the main part of the face.  It is attached with runner adhesive.  I added a 2 1/2" x 4" piece of Real Red card stock to the top for the hat.  It is also attached with runner adhesive.   I punched a 1 1/4" circle from Whisper White and attached it at the top of the hat with runner adhesive also.  Next I used the retired Billboard decorative strip die and cut out a red "M" to put on the circle.  The hat brim was made using the Oval framelits collection.  I used the third smallest oval and cut it in half (actually it is a little bigger than half).  I added a white large oval with the greeting stamped on it.  The greeting is from the Teeny Tiny Wishes stamp set and is stamped in Real Red ink.  The oval is attached to the brim using runner adhesive and the brim piece is attached to the hat with dimensionals.


Mario does have beautiful eyes doesn't he?  I used Whisper White wide ovals, Pacific Point large ovals, and Basic Black retired small ovals to make these.  They are layered together with runner adhesive and attached to the card using the same adhesive.  I added a little white gel pen to the eyes.


The nose is made using the wide oval punch and Blushing Bride card stock.  It is attached to the card using dimensionals (do this after the mustache is attached).  The mustache is Basic Black card stock.  I punched out a 1 1/4" circle and a 1 3/4" circle from this.  I cut these in half and ran them through the big shot using the woodgrain impression folder to add texture.  The circles are layered together and attached to the card with runner adhesive.

To be fair, I encourage you to check out Leena's site by clicking here .  Her's is really cool.  I am pretty proud of how mine turned out too.

Well that's it for today.  I am going to catch up on the inside of some of my cards this weekend but do plan on making something to share on Monday.  I wish you all a wonderful weekend.  I will see you Monday.  Thanks for dropping by today to visit!!!!!!

Thursday, April 18, 2013

What A Nice Day!!

Hi everyone and happy Thursday!!!  We had a beautiful day here in Phoenix Arizona yesterday.  There was a nice cool breeze and it was a little overcast.  We were able to have the windows open and truly enjoy the fresh air.  It was wonderful!!  You see we Arizonians know that soon the temperature will go up and these nice days will be gone for a long time. 

I did get into my craft room and made a card to share today.  I focused once again on Mother's Day.  I was inspired by a card I saw on Pinterest.  Now I had this idea in mind for my card prior to seeing the one on Pinterest.  It was kind of weird to see one so similar to the card in my mind.  I almost scrapped the idea and went in a different direction.  However, I decided to go ahead and make this one.  I guess you can just say creative minds think alike!! 


I started with a base card of Raspberry Ripple cut at 5 1/2" x 8 1/2", scored at 4 1/4".  I added a layer of Old Olive card stock measuring 4 1/8" x 5 3/8".  For the top layer, I started with a 4" x 5 1/4" piece of Very Vanilla card stock.  I ran this through my big shot using the Petals-a-plenty impression folder.  I then took a piece of Raspberry Ripple card stock cut at 2 1/2" x 4" and ran it through the big shot using the Fancy Fan impression folder.   I layered this onto the vanilla using runner adhesive.  I then cut a piece of Very Vanilla grosgrain ribbon and put it across the front where the pieces meet.  I adhered it with a little runner adhesive in the front and glue dots on the back.  The vanilla was then attached to the olive, then the olive to the raspberry all with runner adhesive. 


Here is a close up of the top of the card.  To create the flowers, I used the scallop flower punch from the itty bitty punch pack and the scallop flower on the boho blossom punch.  I punched out the larger flowers from raspberry, olive and vanilla.  I also punched out the smaller flowers in the same colors.  I layered the small vanilla onto the large olive and raspberry flowers using a liquid glue.  I attached these to the card with dimensionals and then added a rhinestone to the center of each flower.  Just to add a little bling to the background, I added some green rhinestones to the center of a few flowers.


Now for a closer look at the bottom half of the card.  Again you can see the flowers were made just like the top.  I added pearls to the center of these.  I thought they showed up better here.  Had I used them up top, they would have blended with the vanilla too much.  Again flowers are attached with dimensionals and small pearls are added randomly to the background.


For my greeting I chose to use the retired stamp set called Well Scripted.  I stamped the greeting in Raspberry Ripple ink onto Very Vanilla card stock.  I punched it out using the decorative label punch.  I then created the punch frame using the same punch and Old Olive card stock this time.  The frame is attached to the greeting using runner adhesive.  I added 2 Raspberry Ripple flowers punched with the scallop flower from the itty bitty punch pack to the corners.  They are attached with liquid glue and have a small pearl added to the center of each one.  The completed greeting is attached to the center of the card over the ribbon with dimensionals.  

Well that is all for today.  I am off to clean the house a little and take care of my sister.  Tomorrow my favorite little man is coming over to play again so I need to be ready for him.  I will return with another share for you tomorrow also.  I wish you all a wonderful day.  Thanks for stopping by to visit today!!!!

Wednesday, April 17, 2013

Owl Punch Strikes Again?!!!!

Hi everyone and welcome to Wednesday.  My sister is doing pretty well.  Once the numbing medication wore off, she experienced a little more pain (okay so it was a lot) but luckily, we were able to somewhat control it with her pain medication.  The only bad thing about the medicine is it makes her super tired and itchy.  She takes a benedryl to help with the itchiness but that makes her more tired.  Basically, she just needs a lot of rest and naps.  Good thing the move for my daughter happened last week and not this week.

My card I made to share with you today is one that uses the wonderful owl punch once again.  It's funny but when I went into my craft room and saw this punch, I knew I had to use it.  I guess it had been too long since I used it last.  Anyway, let me show you the card and we'll get started.


The base card for this one is Melon Mambo card stock measuring 4 1/4" x 11".  I scored it at 5 1/2".  I added a layer of 4" x 5 1/4" Whisper White.  I ran this through my big shot using the music note impression folder and sponged the edges with Daffodil Delight ink.  I attached it to the card using runner adhesive.


For my greeting, I used an alphabet stamp set and scrap pieces of Daffodil Delight, Melon Mambo and Tempting Turquoise.  I stamped the letters using VersaMark ink and heat embossed them with black embossing powder.  I made sure when I stamped the letters that I did it in the pattern I wanted to use.  Once the heat embossing was done I punched the letters out using my 1/2" circle punch.  I attached them to the card using dimensionals.  


For my character on this card, I wanted to make a little chef.  Now I have made chef guy several times and I thought it was time to make chef girl this time.  The only punch used to create her is the owl builder punch.   I used Whisper White, Melon Mambo, Basic Black and Early Espresso card stock to make her.  The chef hat, jacket, pants and face are the vest from the punch.  the back of the hair is the owl body minus the feet.  I used the feet to make the bangs on the chef.  The arms and feet are the heart from the punch, and the eyes and nose are the smallest circle from it.   I used a fine tip black marker to add the flap and buttons to the jacket as well as the dots in the eyes.  The mouth is drawn on using a fine tip magenta marker.  I added circles to the pants and hats using the smallest circle from the owl punch and then added glitter glue to the dots to make them sparkle.  All pieces were assembled using liquid glue and the finished chef is attached to the card using dimensionals.


The only other punch used on this card is the cupcake builder punch.  I used all my glittery card stocks on this one.  Now the frosting is Shimmer White card stock.  I added dots of Melon Mambo and Tempting Turquoise.  Once they were attached I added glitter glue to them for some shine.  the candle is the Champagne Glimmer card stock with a Daffodil Delight flame.  I did add glitter glue to this flame also.  The cherry is Red Glimmer card stock and the cup is Silver Glimmer card stock.  All pieces of this were adhered together with liquid glue and the finished cupcake is attached using dimensionals.  I added some of the glitter glue to the background just for a little more shine.

Well I am off to help my sister again.  I want to be sure she takes her meds and gets a good nap today.  I do plan on crafting though so stop by tomorrow to see what I make.  Thanks for dropping by today!!

Tuesday, April 16, 2013

More Inspiration for You

Hi everyone and happy Tuesday.  I am happy to say that my sister's surgery went well and she is recovering at my home.  It is fun to spend time with her.  We were at the surgical center for the entire first half of the day.  Once we got home, I got her all settled and went off to the pharmacy to pick up her medicines.  I fed her lunch when I finally was home and then it was time for her to nap.  Now I know it is not an excuse but I chose to nap too.  The wind is blowing here in Phoenix stirring up all the dust and allergy stuff.  I had a pretty good sinus headache going by the time lunch was finished.  I wanted to work in my craft room but was unable to complete the project I was working on before it was bedtime. 

I think the hardest part of the surgery for my sister is the recovery.  She cannot put any weight at all on her right foot and has one of those knee scooters to get around with.  She is still getting use to it and I am trying to be as helpful as I can and also be the cheerleader to encourage her.  Hopefully every day will get easier and easier. 

I did want to share something with you so I have chosen to share a few more cards that I found on Pinterest that have inspired me. 

Family Reunion Hamburger Punch Art
 This is a perfect card for a boy.  I have never met a man or boy who doesn't like to eat.


 My father in law loves cars.  I may have to give this antique car a try for Father's Day.  I will let you see how mine turns out.


 This one caught my eye because I love to read.  My mom was an avid reader and I guess I learned to love books from her.


 How fun is this card?  I would love to send one like this to a girl friend.  I know I will be attempting this one and will definitely share it with you when I do. 

Well that's it for today.  I will be back with my own creation tomorrow.  Until then, have a wonderful day and thanks for stopping by!!!!!

Monday, April 15, 2013

A New Holiday To Focus On

Hi everyone and welcome to Monday.  I would say happy tax day but who looks forward to taxes!!  I hope you all had a wonderful weekend.  I tried to rest up some since this will be another busy week for me.  I am taking my sister this morning to have surgery on her right foot.  Apparently she tore a tendon years ago and it has never healed.  Now it is causing her a lot of pain so it has become necessary to have it fixed.  Hopefully all will go well and she will have no complications.  I am having her come stay with me for a few days so that I can help her. 

I finally managed to get into my craft room this weekend for a little bit.  I could not decide what to make for you and started thinking about what holiday would be coming up.  It just happens to be Mother's Day.  So this is the first of several cards I will do honoring this day.  Let me show this one to you and let's get started.


I started with a base card of Daffodil Delight cut at 4 1/4" x 11", scored at 5 1/2".  I added a layer of Rich Razzleberry measuring 4 1/8" x 5 3/8".  For the top layer, I went with a piece of Whisper White card stock cut at 4" x 5 1/4".  I took this piece and ran it through my big shot using the Vintage Wallpaper impression folder.  I am going to move on to the next component and will share with you a closer look at the background in a minute. I attached all these layers together using runner adhesive.


The colors I chose to use for my flowers are Rich Razzleberry, Daffodil Delight and Melon Mambo.  I used Wild Wasabi for the leaves.  I used only 2 punches to make these:  the blossom builder punch and the 3/4" circle punch.  I punched 6 petals for each flower, a 3/4" circle of the flower color to glue the petals to and 3 leaves.  I sponged the edges of the petals and the leaves with coordinating ink colors/  I used a liquid glue to attach the petals to the circle and to attach the leaves to the back of the circle.  I then used an alphabet stamp set to stamp the letters for "mom" onto Whisper White using inks to match my flower colors.  I then punched the letters out with the 3/4" circle punch.  I then sponges the edges with the third color so every flower has some representation of the other 2.  The letter circles are attached to the center of the flowers using liquid glue.  I added some Dazzling Details liquid glitter glue dots to each petal for pizzazz!!


Prior to attaching the white layer to the base, I used the ink colors of the flowers and my sponges to add color to the background.  I sponged each color in a diagonal area across the card to that it was a rainbow effect.  I then attached it to the card.   The finished flowers were attached using dimensionals.  I decided to add a couple of gem stones to the open areas of the cards so nothing would look barren.  

I do hope to make it into the craft room today to make another card for you.  Not sure what the theme will be for it.   Please come back to visit me tomorrow.  Thanks for dropping by today!

Friday, April 12, 2013

It's Jackson Day!!!!!

Hi everyone and happy Friday to you all.  I am so happy to finally reach this day and spend it with one of my favorite little people, Jackson.  All the shares I chose for today are inspired by him.  I thought it would be fun to look for things that made me remember what it was like to have my girls be little and how much fun it was to play with them. 


I have is Noah's ark stamp but never thought about using it like this.  Now that I have seen this one, I really love the effect.  I am definitely going to try a card like this.


Pizza punch art card

What kid doesn't like pizza?  I remember taking my girls to Chucky Cheese (did I spell that right) and Peter Piper Pizza when they were younger.  We would eat and play games.  One day I will have to take Jackson to do these fun things too.  


I had to include this card in today's blog for many reasons.  One being that I use to teach elementary school.  The second one being that Jackson's mommy, Kayla, happens to be a teacher now.  She also decorated his nursery with owls so it all seemed to work together.

I am very thankful to all of you for sticking with me this week.  I am officially back in my craft room now and will be back on Monday with an original share to show you.  I do hope you come by to see it.

Have a wonderful weekend and do something you truly enjoy.  I will see you all next week!  Thanks for dropping by today!!!!

Thursday, April 11, 2013

The Day After

Welcome to Thursday!!!!  I am happy to say we all survived.  I am a little tired and sore today but at least most of the heavy work is finished and now my daughter can set everything up the way she wants.  I am going to make this post short simply because I am too tired to even think.  Here are a few cards I found to share with you:

Stampin up stampinup order online pretty floral frames framelits dies big shot daydream medallions card idea

I love the colors used in this one.  The medallions look beautiful!!!!

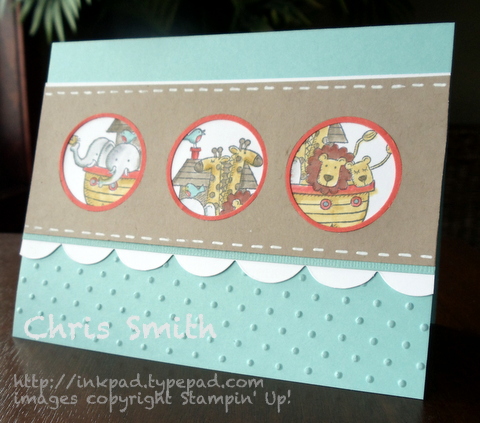
 How cute is this?  A card with a matching top note purse.  Where do people come up with these ideas!!!


So Grateful with Baja Breeze

Love, love, love the butterflies.  I am always looking for cards that display these!

Well I am going to take a nap and relax.  Tomorrow I get to spend part of the day with little Jackson.  I can hardly wait!!!!!  See you all later and thanks for stopping by today!

Wednesday, April 10, 2013

It's Moving Day


Hi everyone.  Well Wednesday is finally here and my youngest is moving out.  I am so excited for her but at the same time, I am truly sad to see her go.  It is the end of a chapter for me.  While I know you never stop being a parent and worrying about your children, it is the end of bringing them up, preparing them for life and seeing them everyday.  I feel like I have all these different emotions going on and they have been all shaken up.  Tears will come later I am sure but for now, I will put on a smile, do a little stretching and get ready to help her move.

As promised, I am going to share a few more cards with you today that have caught my eye. 


Thanks a Ton

I'll try be back tomorrow hopefully with a few more cards to share with you.  However, depending on what time we finish the moving, I may be too tired.  I hope you understand and it could be Monday before you hear from me again.  Until then, get inspired and send me a photo of your cards.  I would love to see them.  Thanks for stopping by today!!

Tuesday, April 9, 2013

More Shares from Others


Hi everyone.  Well the mountain of boxes is growing steadily.  I did take some me time yesterday to find some other cute cards to share with you today.  Here are a few of the ones I thought were just wonderful and inspired me to want to try to make one like them:


Basic Baby Animal Punch Art Card


Aren't they cute?!!!  Check in with me tomorrow for more inspiration.  Thanks for stopping by today!


Monday, April 8, 2013

A Funny Thing Happened.................

Hi everyone and welcome to Monday!  I am not starting this week off the way I thought I would.  I thought I would spend this weekend in my craft room making cards to share with you for the week.  I knew the heavy packing would start on Sunday but thought I would have the time to get something done before then.  However, I was wrong. 

My daughter decided to start packing boxes on Thursday.  As you know my craft room is storage central until the move this Wednesday.  By Friday morning here is what my craft room looked like.


All my main work areas were blocked and there was no way to get in to reach all the items I needed to do my cards!  If it was not a packed box, it was a loose item or a box waiting to be built and packed.  Needless to say, by this morning, it is a lot worse.  I cannot even enter the room.  I know this will continue until Wednesday so I will not have access to my room until Thursday morning.  

I have decided I will just take this week off from blogging simply because there will be no way into the room for half the week.  I will also be helping with the move and plan on being available on Wednesday and Thursday.  On Friday I get to spend time with my favorite little man, Jackson.  I can hardly wait to have the day to play with him.  I do hope to spend time cleaning my craft room on Thursday so I can work in it on Friday afternoon and over the weekend.  I will need the mental break by then.  

I appreciate your understanding.  I thought I would share with you a card that I found on the internet that I really like.  I am going to try to do this off and on all week long.  We will just see how busy I get.  Here is today's share:


H Bday1

I thought this was one of the prettiest cards I had seen in a while.  Here is the link to the site where I found it:   http://prettypapercards.com/2013/03/05/you-are-simply-wonderful/

Please stop by each day and see if I have been able to find cards to share or if I miraculously get a card made for myself.  Thanks for all your understanding and thanks for stopping by.  See you later!!