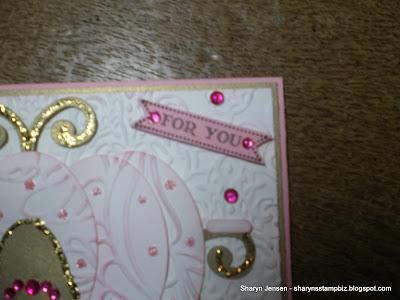
This is totally a girly card. I love it!! I started with a base card of Pretty in Pink card stock cut at 5 1/2" x 8 1/2", scored at 4 1/4". I added a layer of Brushed Gold cut at 4 1/8" x 5 3/8" using runner adhesive. For the top layer, I went with Whisper White measuring 4" x 5 1/4". I ran this piece through the big shot using the Lacy Brocade impression folder. I sponged the edges of this pieces with a little Pretty in Pink ink and attached it to the card using runner adhesive. After the coach and the greeting were attached, I added pink rhinestones to the card.
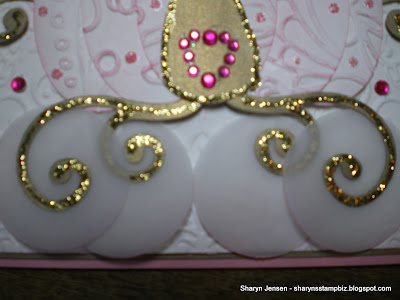
Now let's talk about this beautiful coach. I started by punching 5 wide ovals out of Whisper White. I ran these pieces through the big shot using the Elegant Lines impression folder and sponged the edges with Pretty in Pink ink. I then sponged a little ink on the top of each oval too. These are layer together and attached using liquid glue. Next I punched a large oval out of Brushed Gold card stock and attached it to the top wide oval of the coach using liquid glue. I trimmed off the bottom of the large oval to fit to the wide oval. I then pulled out a sizzlit die called Scribbles Swirls which is retired and cut out four sets of these swirls from Brushed Gold also. I used 2 of the small swirls and attached it to the top as the ornament and then used the other 2 small swirls on the sides to make the base of the seats for the driver and the coachman. All these were attached using liquid glue. The seats were made by punching horizontal slots (retired punch) out of white. The edges are sponged with Pretty in Pink ink and they are attached to the seats with a two way glue pen.
I used 2 of the large swirls to form the base of the coach. I set the other 2 aside for use on a future project. I attached these using liquid glue to the coach. Then I took vellum card stock and punched out four 1 3/8" circles. These serve as the wheels of the coach. I brushed a little pink ink onto them too. I attached the gold pieces to the vellum using a 2 way glue pen. Once all pieces of the coach were attached together, I added gold glitter glue to the gold parts and pink glitter glue dots to the white of the coach. I also added pink rhinestones to the door of the coach in the shape of a heart. Once the coach was completely dry, I attached it to the card using dimensionals. These will show through the vellum so placement is important if you want them hidden.
For the greeting, I used the stamp set Itty Bitty Banners. I stamped the greeting onto Pretty in Pink card stock and then cut it out using the Bitty Banners framelits and my big shot. I attached this to the card using dimensionals and again added pink rhinestones to each end.
I am really proud of this card. I think my coach came out beautifully. I know I will be making this one again. I am so glad I got to share it with you. Thanks for stopping by today and I will see you all tomorrow.


No comments:
Post a Comment