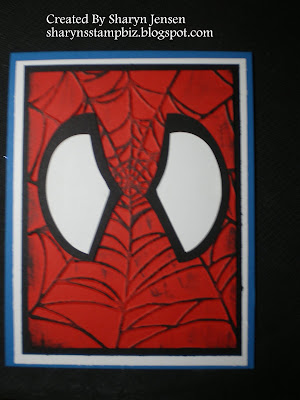
Now one of the main attractions to this card for me was the creative use of the the web impression folder. But let's start at the beginning shall we. I started with a base card of Pacific Point cut at 5 1/2" x 8 1/2", scored at 4 1/4". Next I added a layer of Whisper White cut at 4" x 5 1/4". After that came another layer this time in Basic Black. It is cut at 3 3/4" x 5". Now I was ready to take on making his face.
As I said before, this is an extremely creative use of the web impression folder. I started with a piece of Poppy Parade card stock cut at 3 1/2" x 4 3/4". I chose the Poppy color instead of red because to me it looked more like the Spiderman color I remember. I placed this piece in the web impression folder, centering the web as best as I could. Then I ran it through the big shot. Using my Basic Black classic ink pad, I brushed it over the top of the raised side of the impression making sure not to push down. The idea is to highlight the web. Of course, you inevitably get some on the other parts but it just adds character to the card. I then adhered it to the black layer of the card using my runner adhesive. The eyes were make using the ovals die for the big shot. The smallest oval was cut in white, while the medium oval was cut in black. I then trimmed the white ones into the shape I wanted. Once I had it, I used it as a guide to cut the black ovals down to match. Then adhere the white to the black and attach to the "face" of the card.
A very simple card but I thought is was wonderful looking. Thanks again Tami. I am off to clean my house to get ready for Thursday. Tomorrow is food prep day. I can hardly wait to eat all that turkey!
Thanks for stopping by today. See you tomorrow.

No comments:
Post a Comment