This is how my project started out. As you can see, I have cut out 4 of the Bags w/Scallops and 14 top notes using my handy Big Shot. I took 6 of the top notes and ran them through again twice to cut out the small pieces to layer the front of my pumpkin with. Once all those pieces were cut, I sponged the edges with pumpkin pie ink. Did I forget to mention I used pumpkin pie card stock? Silly me. Using garden green card stock, cut out 2 leaves for each pumpkin with the big shot and the Leaves #2 die. You can use any of the leaves you would like. Use the pennant punch with soft suede card stock, you can punch out the non-scallop pennant (4 of them) for the stem. I always assemble the front piece of the pumpkin before they are attached to the boxes.
Here are the assembled boxes. I use sticky strip to assemble these to make sure they hold. Now usually you would fold in the sides and the scallop would be the lid for the bag. However, for this project, you will actually cut off the scallop lid and leave the box open. I put sticky strip on the front and back of these without removing the top red strip. You do not want to remove this until you are ready to adhere the top note front and back. Also, be sure to only do one side at a time. But for these pumpkins, I needed to add a little something to them before assembling them. Then I attached the front and back. Are you ready for the final product?
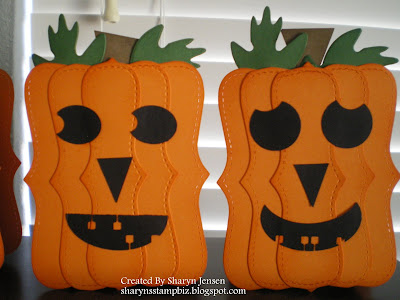
Since it's Halloween my pumpkins needed faces!!!!!
Here is a close up of the first 2.
And here are the other 2 close up. I think these are adorable. I cannot wait to fill them and give them to my kids on Pumpkin Carving day. That's right. In our family, we schedule a day to carve pumpkins. It's messy but fun!
I hope you enjoyed seeing these. Have a wonderful rest of your Wednesday. Thanks for dropping in and I will see you tomorrow.


No comments:
Post a Comment