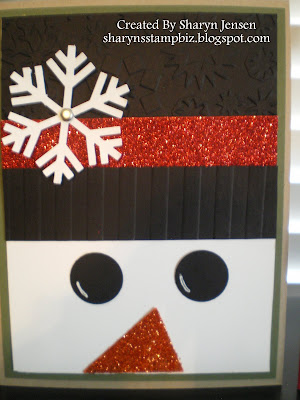
This first one as you can see is a snowman. I used the red glitter paper from SU! for the hat band. I happen to have a snowflake impression folder not from SU! to use for the top hat. Then I used the new Stripes impression folder from the 2011-2012 catalog. I will tell you to check out the Holiday Mini when it comes out in September for an impression folder that would work for the top part!! I added orange glitter to the "carrot" nose which I punched out of Tangerine Tango card stock using the pennant punch. I wanted to give him a little something special just to dress him up so I added the snowflake to his hat. Overall, I was pleased with the outcome. I happen to share it with my daughter and she came up with the idea of the next face I would make.
The elf was her idea and she asked me to bring it to life. Of course I accepted her challenge and went to work right away. I used an impression folder not from SU! for the top of his hat. I know I am not being faithful but you should see how much stuff I have at home. I have to use it. You could use an SU! folder. It would work just as well. For the brim of his hat, I cut a 1" strip of Garden Green. I then punched out Real Red pennants with the pennant punch and trimmed them down to 1" high. This allowed me to make a nice pattern for the hat. Then I ran the piece through the Big Shot using the Perfect Polka Dots impression folder. The ears are the large petal from the Blossom Petals Builder punch. I used the small oval for his nose and then added Blushing Bride ink to his cheeks. His hair is a piece of Soft Suede card stock. I free handed the scallop for the hair to make it look wavy. When I showed my daughter what I had come up with, she was thrilled. She thought he was cute. Of course, I think he is cute too.
Once again the weekend is upon us. I wish all of you a happy and safe weekend. I will be back on Monday with another sample for you. Until then, thanks for dropping in today!!


No comments:
Post a Comment