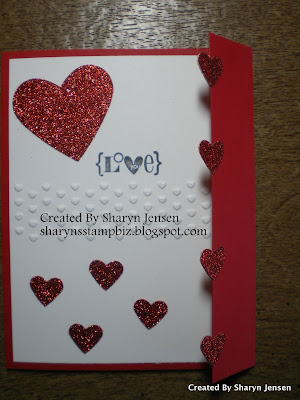
Pretty huh? This card is started with a piece of Real Red card stock cut at 5 1/2" x 9 3/4". You then score it at 4 1/4" and 8 5/8". That folds the card in the middle and creates the flap you see on the outside. I added a layer of Whisper White to the inside right away. Then for the front of the card, I also wanted a piece of Whisper White but I wanted to emboss it across the middle.
This impression folder is from the new set in the Occasions Mini called Adorning Accents. You use it just like the other impression folders with your big shot. It is just much smaller and will only emboss a strip of the paper. Once the hearts were embossed, I adhered the card stock to the front with snail adhesive. I then turned to my wonderful red glimmer paper and punched out 2 full hearts and 14 small hearts. I added one full heart to the top of the card and then stamped my greeting. This one comes from the retired set called Valentine Defined. I then took 3 small hears and placed them on the bottom half making sure to not place any of them under the flap. On the outside of the flap, I placed 4 hearts coming down. I put adhesive on the entire heart but only attached half to the front.
Next, you put adhesive on 4 more small hearts. You then open the flap which will show you the back half of the hearts on the front. Adhere another small heart to the back of each heart so that it shimmers on both sides. (Did that make sense? I hope it does.) Line them up as best as you can.
For the inside, I wanted to add some decorations so I put my other full heart at the top left and the last 3 small hearts under it. Once again I used the retired set called Love You Much for my greeting. Once again I stamped it onto the white using the StazOn ink. This time I colored it with my Real Red marker. This is a quick card to make and a beautiful one to give to that special someone.
I cannot believe we are at Wednesday already. Where does the time go. I have a full day ahead so I better get to it. I will be see you tomorrow with another share. Thanks for dropping in today.


No comments:
Post a Comment